
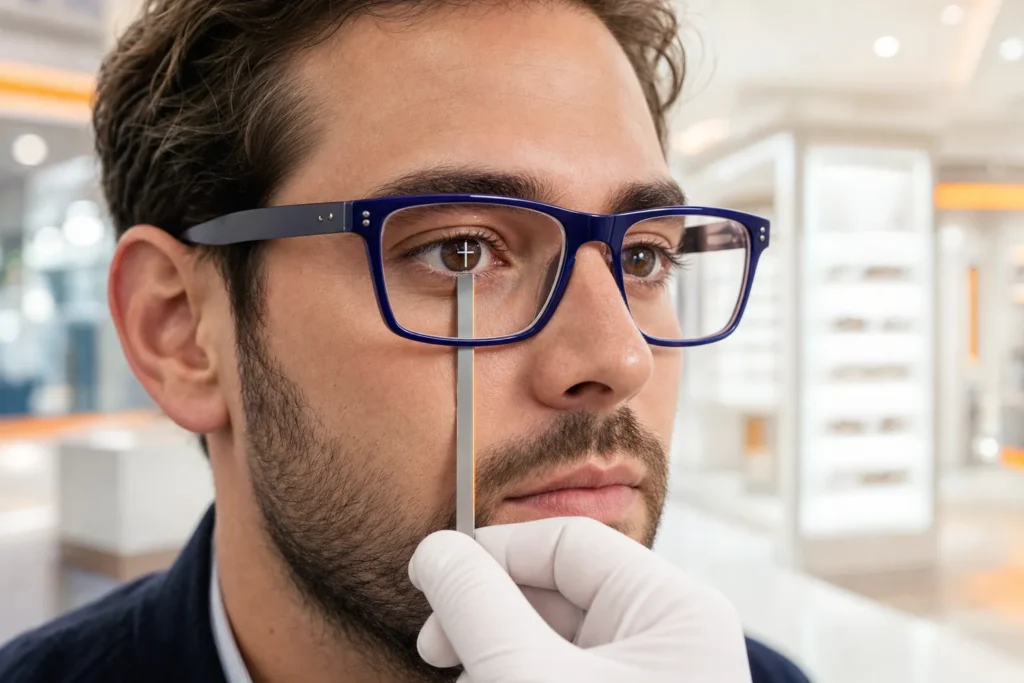
Quick answer: a progressive lens job passes the fitting height check when the measured fitting height (pupil center to the lowest point of the lens shape) is equal to or greater than the minimum published for that lens design, and there is enough lens above the fitting cross for comfortable distance vision. Most short-corridor designs need 13 to 14 mm; standard corridors need 17 to 18 mm. The calculator below runs the full check, including the vertical decentration the fitting height creates. If you still need the measurement itself, Optogrid takes it from a single photo, even without the frame on the face.
What the Calculator Checks
The calculator takes four inputs: the frame’s B measurement (vertical boxed lens height), the measured fitting height (FH) for each eye, and the minimum fitting height of the lens design you plan to order. It then runs three checks:
1. Design minimum
PASS if: FH ≥ minimum fitting height of the designThis is the check that decides whether the reading zone survives edging. Cutting a progressive below its minimum removes part or all of the near zone. The wearer gets a lens that never delivers its full add power, and the remake is on the shop.
2. Distance zone clearance
Clearance = B − FH (target: at least 8 mm)ZEISS fitting guidance recommends at least 8 mm of lens above the fitting cross to the top rim so the distance zone stays usable. A very deep fitting height in a shallow frame can fail this check even when the design minimum passes.
3. Vertical decentration
Vertical decentration = FH − (B ÷ 2)This is how far the fitting cross sits above the geometric center of the lens shape. It matters for blank size: the standard bench formula ignores it, so a frame with a high-riding pupil can need a larger blank than the horizontal-only estimate suggests. Our Minimum Blank Size calculator covers the horizontal side of that calculation.
What Sets the Minimum: Corridor Length Plus Near Zone
A progressive design has a fixed vertical geometry. The fitting cross sits at the pupil, the corridor carries the power progression downward, and the near zone begins where the corridor ends. The published minimum fitting height is essentially the corridor length plus enough of the near zone to be usable.
The trade-off is not free. A shorter corridor squeezes the same power change into less vertical distance, which narrows the usable near zone and concentrates peripheral astigmatism. ZEISS documents this relationship directly in its fitting height guidance:
| Fitting height | Corridor length | Near zone width |
|---|---|---|
| 20 mm | 16 mm | 15 mm |
| 18 mm | 14 mm | 13 mm |
| 16 mm | 12 mm | 9 mm |
| 14 mm | 10 mm | 6 mm |
A 14 mm fit on a 10 mm corridor leaves a reading area less than half the width of a 20 mm fit on a 16 mm corridor. The minimum is what physically fits; it is not what reads best.
Minimum Fitting Heights by Design
Values below come from the manufacturers’ own availability charts, fact sheets and technical documents (linked in Sources). Minimums are design-generation specific, so always confirm against the current chart from your lab before ordering.
| Manufacturer | Design | Minimum fitting height |
|---|---|---|
| Essilor | Varilux X Design / X Fit / X 4D | 14 mm |
| Essilor | Varilux Physio W3+ (all variants) | 14 mm |
| Essilor | Varilux Comfort Max / Comfort Max Fit | 14 mm |
| Essilor | Varilux Comfort W2+ | 14 mm |
| Essilor | Varilux Physio DRx / Comfort DRx | 17 mm |
| ZEISS | SmartLife Pure (fixed corridors S/M/L) | 14 / 16 / 18 mm |
| ZEISS | SmartLife Plus (variable corridor) | 13 mm |
| ZEISS | SmartLife Superb (variable corridor) | 13 mm |
| ZEISS | SmartLife Individual 3 | 13 mm variable, or 14 / 16 / 18 mm fixed |
| ZEISS | Light 2 3Dv / 3D / D | 13 mm variable / 14-16-18 mm / 14-18 mm |
| Hoya | Hoyalux iD MyStyle 2 | personalized to frame, 14 mm |
| Hoya | Hoyalux iD LifeStyle 3 | 14 or 18 mm |
| Hoya | Hoyalux Array 2 | 14 / 17 / 19 / 21 mm |
| Hoya | Hoyalux Summit ecp/cd BKS | 14 or 19 mm |
| Hoya | Amplitude HD3 / Mini | 14 or 18 mm |
| Hoya | GP Wide | 18 mm |
| Shamir | Autograph Intelligence | 11 / 13 / 15 / 18 mm, plus Variable |
| Kodak | Unique / Unique HD | 14 mm (variable corridor, 1 mm steps) |
| Kodak | Easy | 13 / 14 / 16 / 18 mm |
| Kodak | Precise Digital | 18 mm |
| Kodak | Precise Short | 13 mm |
| Kodak | Concise Digital | 14 mm |
Two footnotes worth knowing at the counter:
- Add power can be capped at short fitting heights. Essilor’s availability chart limits several Varilux designs to a lower maximum add when the fitting height is under 17 mm. A 14 mm fit with a +3.50 add may not be orderable even though 14 mm is the design minimum.
- Variable-corridor designs pick the corridor from the height you send. On designs like Kodak Unique, Shamir Autograph Intelligence Variable or ZEISS SmartLife Plus, the lab computes the corridor from your measured fitting height. The check changes from pass/fail to “this is the corridor the wearer will get”, which makes an accurate measurement matter even more.
Fitting Height vs Segment Height
The two terms get mixed constantly, and they are measured to different landmarks. Fitting height is for progressives: lowest point of the lens shape up to the pupil center, where the fitting cross goes. Segment height is for bifocals and trifocals: lowest point of the lens up to the top line of the segment, which sits below the pupil (traditionally at the lower lid margin for a flat-top bifocal). Using a segment height where a fitting height is required drops the fitting cross several millimeters too low, with the same effect as a fitting height error. The full breakdown is in our segment height vs fitting height guide.
When the Frame Fails the Check
If the measured fitting height comes in under the design minimum, there are only honest options:
- Switch to a shorter-corridor design and accept the narrower near zone shown in the table above.
- Choose a deeper frame. A B measurement 2 mm taller usually solves it outright.
- Reconsider the lens type. For very shallow fashion frames, a flat-top bifocal or single vision pair for near work can serve the wearer better than a progressive with a compromised reading zone.
What does not work is fudging the number. Ordering the design’s minimum instead of the true measured height moves the fitting cross away from the pupil, and misplaced fitting heights are one of the classic causes of progressive non-adapt returns.
Measuring Fitting Height Accurately
The check is only as good as the measurement going in. Fitting height must be taken with the chosen frame adjusted and sitting where it will actually be worn, with the customer in natural posture. Optogrid measures fitting height, PD and dual PD from a single front-facing photo, which removes the marker-dot and ruler steps and gives you the per-eye values this calculator expects.
Frequently Asked Questions
What is the minimum fitting height for progressive lenses?
It depends on the design. Short-corridor and variable-corridor designs from the major manufacturers go down to 13 or 14 mm (Shamir’s Autograph Intelligence offers an 11 mm option). Standard-corridor designs typically require 17 to 18 mm. The value is published per design in each manufacturer’s availability chart.
What happens if a progressive lens is fitted below the minimum fitting height?
The edging process cuts away part or all of the near zone. The wearer loses reading area, may never reach full add power, and often reports having to lift the glasses or tilt the head back to read. It is a common cause of non-adapt remakes.
Is fitting height the same as segment height?
No. Fitting height is measured to the pupil center and is used for progressive lenses. Segment height is measured to the top of the visible segment on a bifocal or trifocal, which sits several millimeters lower. Sending one where the other is expected misplaces the optics vertically.
How much space is needed above the fitting cross?
ZEISS fitting guidance recommends at least 8 mm from the fitting cross to the top rim so the distance zone remains usable. The calculator reports this as the distance zone clearance (B minus fitting height).
Does a short-corridor design solve every small frame?
It solves the geometry, not the optics. Shortening the corridor narrows the near zone: in ZEISS’s published figures, a 10 mm corridor delivers roughly a 6 mm wide near zone versus 15 mm for a 16 mm corridor. For heavy readers, a slightly deeper frame is usually the better recommendation.
Sources
- Essilor: Varilux Lenses Availability for Eyecare Professionals (minimum fitting heights and add-power limits per Varilux design)
- Essilor: Varilux Cutout Chart, minimum fitting height 14 mm (family-level minimum; 17 mm for Physio DRx and Comfort DRx)
- ZEISS SmartLife Progressive fact sheet (order parameters: corridor types and minimum fitting heights)
- ZEISS progressive lens portfolio, Eye Care Professionals (Light 2 collection fitting heights)
- ZEISS Fitting Height Guidance (via ABDO) (corridor length vs near zone width; 8 mm clearance above the fitting cross)
- Hoya Lens Availability Charts 2023 (minimum fitting heights per Hoya design)
- Shamir Autograph Intelligence technical sheet (minimum fitting heights 11, 13, 15, 18 mm and Variable)
- Signet Armorlite (Kodak Lens) Further Information, via ABDO (Kodak Unique, Easy, Precise Digital, Concise Digital)
- Signet Armorlite: Kodak Precise and Precise Short (Precise Short 13 mm)